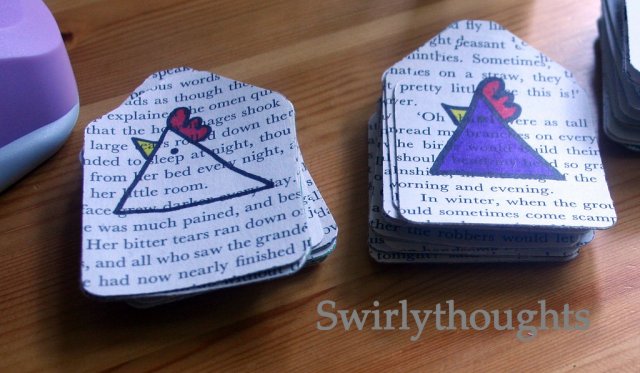
Paper – something strong like book pages/wallpaper. I wouldn’t recommend magazines.
Bubblewrap – I get mine free from the fruit and veg aisle at the supermarket. Just make sure you ask first!
Scissors
Double sided sticky tape along with normal sticky tape
Paper cutter (optional)


How to do it:
Gather two pieces of paper and ensure that they are roughly the same size (you can trim stray edges later). Choose which is going to be the front of the envelope and which is going to be the back. The back piece needs to have about half an inch cut off it at the top.

Turn your back piece over so that the inside of the envelope is facing up. Don’t start with the front piece as the bubble wrap will end up in the way later! The add a small strip of double sided tape around the outside of the paper.
 Cut yourself 2 piece of bubble wrap that fit inside the tape and then peel the backing off the top strip of tape and stick one piece of bubble wrap to it. You may need additional tape behind the bubblewrap near the bottom to secure it firmly.
 Take your second piece of bubblewrap and place it on top of the other piece. Add tape to the back of the bubblewrap as seen
 Peel off all the backing and place the front of the envelope onto the top of the bubblewrap.
 You’ll need to postion it carefully but don’t worry if the edges don’t match up perfectly – you can trim them later. Your envelope will now look like a sandwich
 You will now need to press around the outside of the envelope to stick the 2 pieces of paper together.
And voila – you have a padded envelope made from reclaimed paper!
You can have fun and use lots of different papers. The extra inch on the front piece can be folded down to make the lip of your envelope which can be secured by tape. I also keep scraps of plain paper to use as address labels.

Very easy and great tutorial! I've been making some to send out my orders but your way is much better than mine! :)
ReplyDeleteWow!! And such great reading material too!
ReplyDeleteThat is just way cool, you very clever girl. I shall definitely give this a try.
ReplyDeleteThis looks really easy! Thanks for writing up the tutorial!
ReplyDeleteHave you posted them? The post office accepts them? Very cool idea!
ReplyDeleteLove this tutorial! May have to try it out
ReplyDeleteCool tut - I saw your twitter about it :)
ReplyDeleteWell done
Nic xxx
This is freakin' awesome. Thanks for the super easy tut!
ReplyDeleteBrilliant, I've been on the receiving end of one of your envelopes and they are fab.
ReplyDeletetwiggy x
Oooh! Old calendar pages would work great! I'm going to try it! What a fun idea!
ReplyDeleteThis seems so simple but I've never heard of anything like it before! Great Idea that I will be using....
ReplyDeleteAwesome! Totally saving this idea for making envelopes to send out for my shop.
ReplyDeleteso great! I'm here from whip up! Thanks for sharing.
ReplyDeleteGreat idea! Thanks :) A trip to the DIY store and into the wall paper isle for me! But the best bet is to recycle unused paper so may need to rummage around the house for other ideas.
ReplyDeleteI love this....now I just need to find the right paper!
ReplyDeleteI love ideas like this. I am doing a quilting bee and one of the girls sent my block back in a brown paper sack she had sewn into an envelope. I am determined to do more of that after I saw the awesome brown paper bag envelope!
ReplyDeleteoh WOW! I am def. gonna try some of these for mailing my cards out! book pages, old calendars, oh the possibilities are endless! thanks for sharing!
ReplyDeleteI love this! Greadt tutorial and idea :) I think I might start doing this, I agree with Beth! Too many possibilities :D
ReplyDeleteOh that is a great idea! I'm always running off to the store for more of these! I would love to link to this if you didn't mind.
ReplyDeleteThanks so much for writing such a clear tut. I am going to go thrift store diving this weekend for fabulous books for this great project! Thanks again!
ReplyDeleteI've been saving dsmaged children's books (the books are damaged, not the children) and looking for a way to use them--thank you!
ReplyDeleteOOh so wonderful! I shall be doing that from now on. I've got more paper and bubble wrap than I know what do with.
ReplyDeleteI've been making envelopes out of "recycled" paper for a long time... but never thought of padded envelopes. What a great idea! :D Thanks for sharing. :)
ReplyDeletewhat a great idea, they look fab too. i'm going to be trying that out.
ReplyDeleteThese are fantastic! Thanks so much...I am definitely going to be making some to send out for my etsy shop!
ReplyDeletethis is such a great idea! I often reuse the envelopes I get in the mail which is ok, but can kinda look tacky sometimes. this is a great solution to still recycle but do it in style!
ReplyDeleteThat is amazing!!! I love it! Will bookmark and try once I have some double sided tape.
ReplyDeleteThanks so much!
What a fantastic idea! The envelope you sent me was really cool, I'll definitely be making these thank you for sharing. xxx
ReplyDeleteWonderful and so after my own heart. Great tutorial.
ReplyDeletelove Love LOVE this! Thank you for sharing!
ReplyDeleteThank you for sharing such a fantastic idea! I will definitely make some of these!
ReplyDeleteWhat a cute idea! I had no idea you could get bubble wrap free like that. I've mentioned you on my blog today :)
ReplyDeleteAbsolutely Brilliant. Thank you SO much for sharing this! :)
ReplyDeletewow....you..are..awesome...
ReplyDeleteThis is such a COOL idea. Thank you so much.
ReplyDeleteI just love one-of-a-kind items. I'll be making some of these.
What a great idea!! my only problem would be trying to not cover up the picture, I guess you could use a plan piece of paper on the back and put your label there. and the person would have a bit of a surprize when they went to open it. LOL
ReplyDeleteGreat Job! I love the idea so much, I'd like to print it on the back of my care documents I send out with my bubble wrapped hula hoops. That way it might encourage the recipient to recycle the bubble wrap.
ReplyDeleteWould you mind if I pinch your idea?
I love this method better than mine will be using it from now on
ReplyDeleteBeautiful! I also like using my sewing machine to close the outside edges. You can use a fun stitch to give it a bit of personality too if you use plain old paper grocery bags too :)
ReplyDeletefab idea - looks great!
ReplyDeletegreat tutorial. Love it.
ReplyDeleteThanks so much for this tutorial, just made one to send out to my first buyer! :-)
ReplyDeleteGREAT idea!! So clever and so so cute!
ReplyDeleteWhat a great idea...thanks for sharing.
ReplyDeleteWhat a fab idea. Thanks for sharing it with us
ReplyDeleteI haven't seen this before but your post will give me an idea regarding how we can make this easily.Keep up the great work.
ReplyDeleteThis comment has been removed by a blog administrator.
ReplyDeleteI made a couple tonight and they turned out perfect! Used scrapbooking paper for one and a page from a Frida Kahlo calendar -- she looks lovely!
ReplyDeleteTHANKS!
Awesome... it's so easy! Thanks
ReplyDeleteOh my god, what a brilliant idea! And perfect timing - I was about to buy another batch of envelopes :)
ReplyDeleteLOVE IT, you are a genius!! Plus the fruit and veg aisle is a fantastic tip!
ReplyDeleteThis is great! I think that this would be a great project for third graders at school. I will give this a try. DEFINITELY!!!!
ReplyDeleteWow, I love this idea! Thanks so much for sharing!
ReplyDeleteAwesome idea! one of those...why didn't I think of that moments! Thanks for sharing.
ReplyDeleteOh great idea! Much better than to use the envelopes you can buy from stores. Thank you for sharing this tutorial! :)
ReplyDeleteI also shared this on my blog here: http://whiterabbittreasures.blogspot.com/2012/07/diy-stationery.html
Oh I shared this too, at http://hedgerowfireside.blogspot.co.uk/ Just such an awesome thing to do for yourself, and those bought ones are EXPENSIVE and nowhere near so funky!
ReplyDeletelove this!
ReplyDeleteAwesome idea! Does the post office accept and deliver them? How much postage/stamp would you pay to post this? Thanks!
ReplyDeleteI have been specifically looking for how to make my own padded envelopes and you came to the rescue! Thanks!
ReplyDelete